Affordable Methods to Replace Your Car Headliner at Home
- Gather essential tools like screwdrivers, adhesive, and new fabric before starting your headliner replacement. This preparation saves time and ensures a smoother process.
- Choose cost-effective materials, such as foam-backed headliner fabric, to achieve a professional look without overspending. Always check the size of your car before purchasing.
- Follow a step-by-step approach for removal and installation. Take your time to avoid mistakes, and ensure proper cleaning and preparation for a lasting bond.
Gather Tools and Car Head Liners
What You Need for Car Headliner Replacement
You need the right tools and materials to replace car head liners at home. Start with these essentials:
- Flathead and Phillips screwdrivers
- Socket wrench set
- Utility knife or sharp scissors
- Wire brush or sandpaper
- Spray adhesive (automotive grade)
- New headliner fabric
- Headliner board (reuse your old one if possible)
- Gloves and safety glasses
You can find most of these items at local hardware stores or online. Many stores offer affordable kits for car headliner projects.
Budget-Friendly Material Options
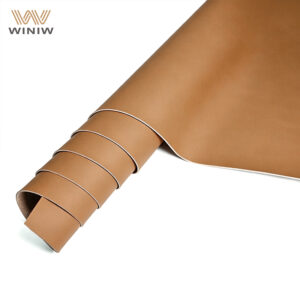
You do not have to spend a lot to get good results. Many car head liners use foam-backed headliner fabric, which costs about $15 per yard. This material gives your car headliner a smooth look and feels soft to the touch. Some people choose vinyl or suede for a different style, but foam-backed headliner fabric remains the most cost-effective choice. You can reuse your old headliner board to save even more money. Always check the size of your car headliner before buying fabric.
Preparation and Safety Tips
Prepare your workspace before you start. Park your car in a shaded area and open the doors for ventilation. Wear gloves and safety glasses to protect your hands and eyes. Lay out all tools and materials so you can reach them easily. Test-fit the new headliner fabric on the headliner board before using adhesive. This step helps you avoid mistakes and ensures a smooth finish.
Tip: Always read the instructions on your adhesive. Some products require a specific drying time for the best results.
How to Replace a Headliner Step by Step
Remove Trim and Old Car Headliner
Start the removal process by clearing your workspace inside the car. You need to remove all trim pieces that hold the headliner in place. Use a flathead or Phillips screwdriver and a socket wrench to take out the A-pillars, B-pillars, and C-pillars. Unbolt the seatbelt from the bottom of the B-pillar for easier access. Next, unscrew and unplug grab handles, sun visors, and dome lights. Leave the dome light for last, then carefully release its screws so you can slide the headliner out.
When removing the old headliner, gently pull the fabric away from the board. Use a putty knife or scraper to help lift stubborn areas, but avoid sharp tools that could damage the ceiling. If you plan on cutting out a new headliner, create a template from butcher paper or thin cardboard before the old one deteriorates. Mark all mounting hole locations to make reinstalling the freshened headliner easier.
Tip: Take your time during removal. Rushing can break fragile trim or tear the headliner board.
Clean and Prep the Headliner Board
After removal, focus on cleaning the headliner board. Scrape off all deteriorated foam and old glue using a wire brush or sandpaper. Clean the board with isopropyl alcohol to remove dust and residue. If the board looks faded or rusted, sand it lightly for a smooth surface. A clean board ensures the new material bonds well and prevents sagging later.
“If sections hang down, the foam likely failed or you glued over dust. Strip everything, clean to bare board, and start fresh with foam-backed custom headliner fabric.”
A smooth headliner depends on steady preparation, the right fabric, and a good adhesive. Work in a well-ventilated area and wear gloves to protect your hands.
How to Install a Headliner with Adhesive
Now you can install a headliner using high-temperature adhesive spray. This type of glue works best for car headliner projects and usually costs $20–$50 for a few cans. Lay the new fabric over the board and cut it long enough to wrap around the edges. For tight corners, cut small “legs” in the fabric to prevent overstretching.
Spray adhesive on both the board and the back of the fabric. Let the glue go tacky for a few minutes before bonding. Work in small sections, starting from the center and pressing outward to avoid bubbles or wrinkles. Apply steady pressure as you go. If you see any seams, use a slight overlap or seam tape, and make sure the nap direction matches to hide joints.
| Step | Description |
|---|---|
| 1 | Let adhesive go tacky before bonding. |
| 2 | Roll from the center out to avoid bubbles. |
| 3 | For seams, use a slight overlap or seam tape. |
| 4 | Ensure nap direction matches to hide joints. |
Wait at least five minutes after applying adhesive before reinstalling trim. Pull the fabric slightly taut, but do not stretch it too much. Trim excess material with a utility knife or sharp scissors for a clean finish.
Reinstall Trim and Finish the Job
Once the adhesive cures, begin reinstalling the trim. Reconnect any wires for dome lights or sun visors before placing the headliner back in the car. Secure the headliner with all clips and trim pieces. Double-check that everything fits snugly and nothing blocks the view or movement of the headliner.
Note: Install all trim and clips carefully to avoid damaging the new headliner material.
Common Mistakes When You Install a Headliner
Many people make mistakes during removal and replacement. Attempting to glue the fabric back on from inside the car only offers a short-term fix. This method does not solve the root cause of sagging and can create more mess later. Improper surface preparation leads to poor adhesion and sagging over time. Using the wrong adhesive or applying it unevenly can also cause lumps or bubbles.
Regular maintenance helps prevent sagging headliners. Always choose the right adhesive for your car headliner material. Avoid excessive force or sharp tools during removal to prevent damage. If you notice wrinkles or bubbles after installing the new headliner material, work in manageable sections and apply pressure as you go. For persistent issues, strip everything and start fresh with proper cleaning and installation techniques.
Tip: Mark all mounting holes and use templates to ensure accurate reinstallation.
By following these steps, you can replace the headliner in your car and achieve a professional result at home.
You can replace your car headliner at home with patience and the right tools. Take photos of wire connections, organize screws, and use 3M 77 spray adhesive for best results. If you face challenges, join DIY forums or share your progress with friends for support and advice.
- Use labeled containers for hardware
- Create templates for accurate cuts
FAQ
How long does a DIY headliner repair take?
You usually finish the job in two to four hours. The process depends on your car model and how much prep work you need.
Can you use regular glue for headliner repair?
You should use automotive spray adhesive. Regular glue does not hold up to heat or humidity and can cause sagging.
What is the best way to clean the headliner board?
Use a wire brush or sandpaper to remove old foam and glue. Wipe the board with alcohol for a clean surface before installing new fabric.